Mr. Fix It

[story and images originally for Alaska Dispatch News]

If you asked Chun B. Park in 1985 what he'd be doing today, he probably would have said repairing appliances — albeit under very different circumstances.

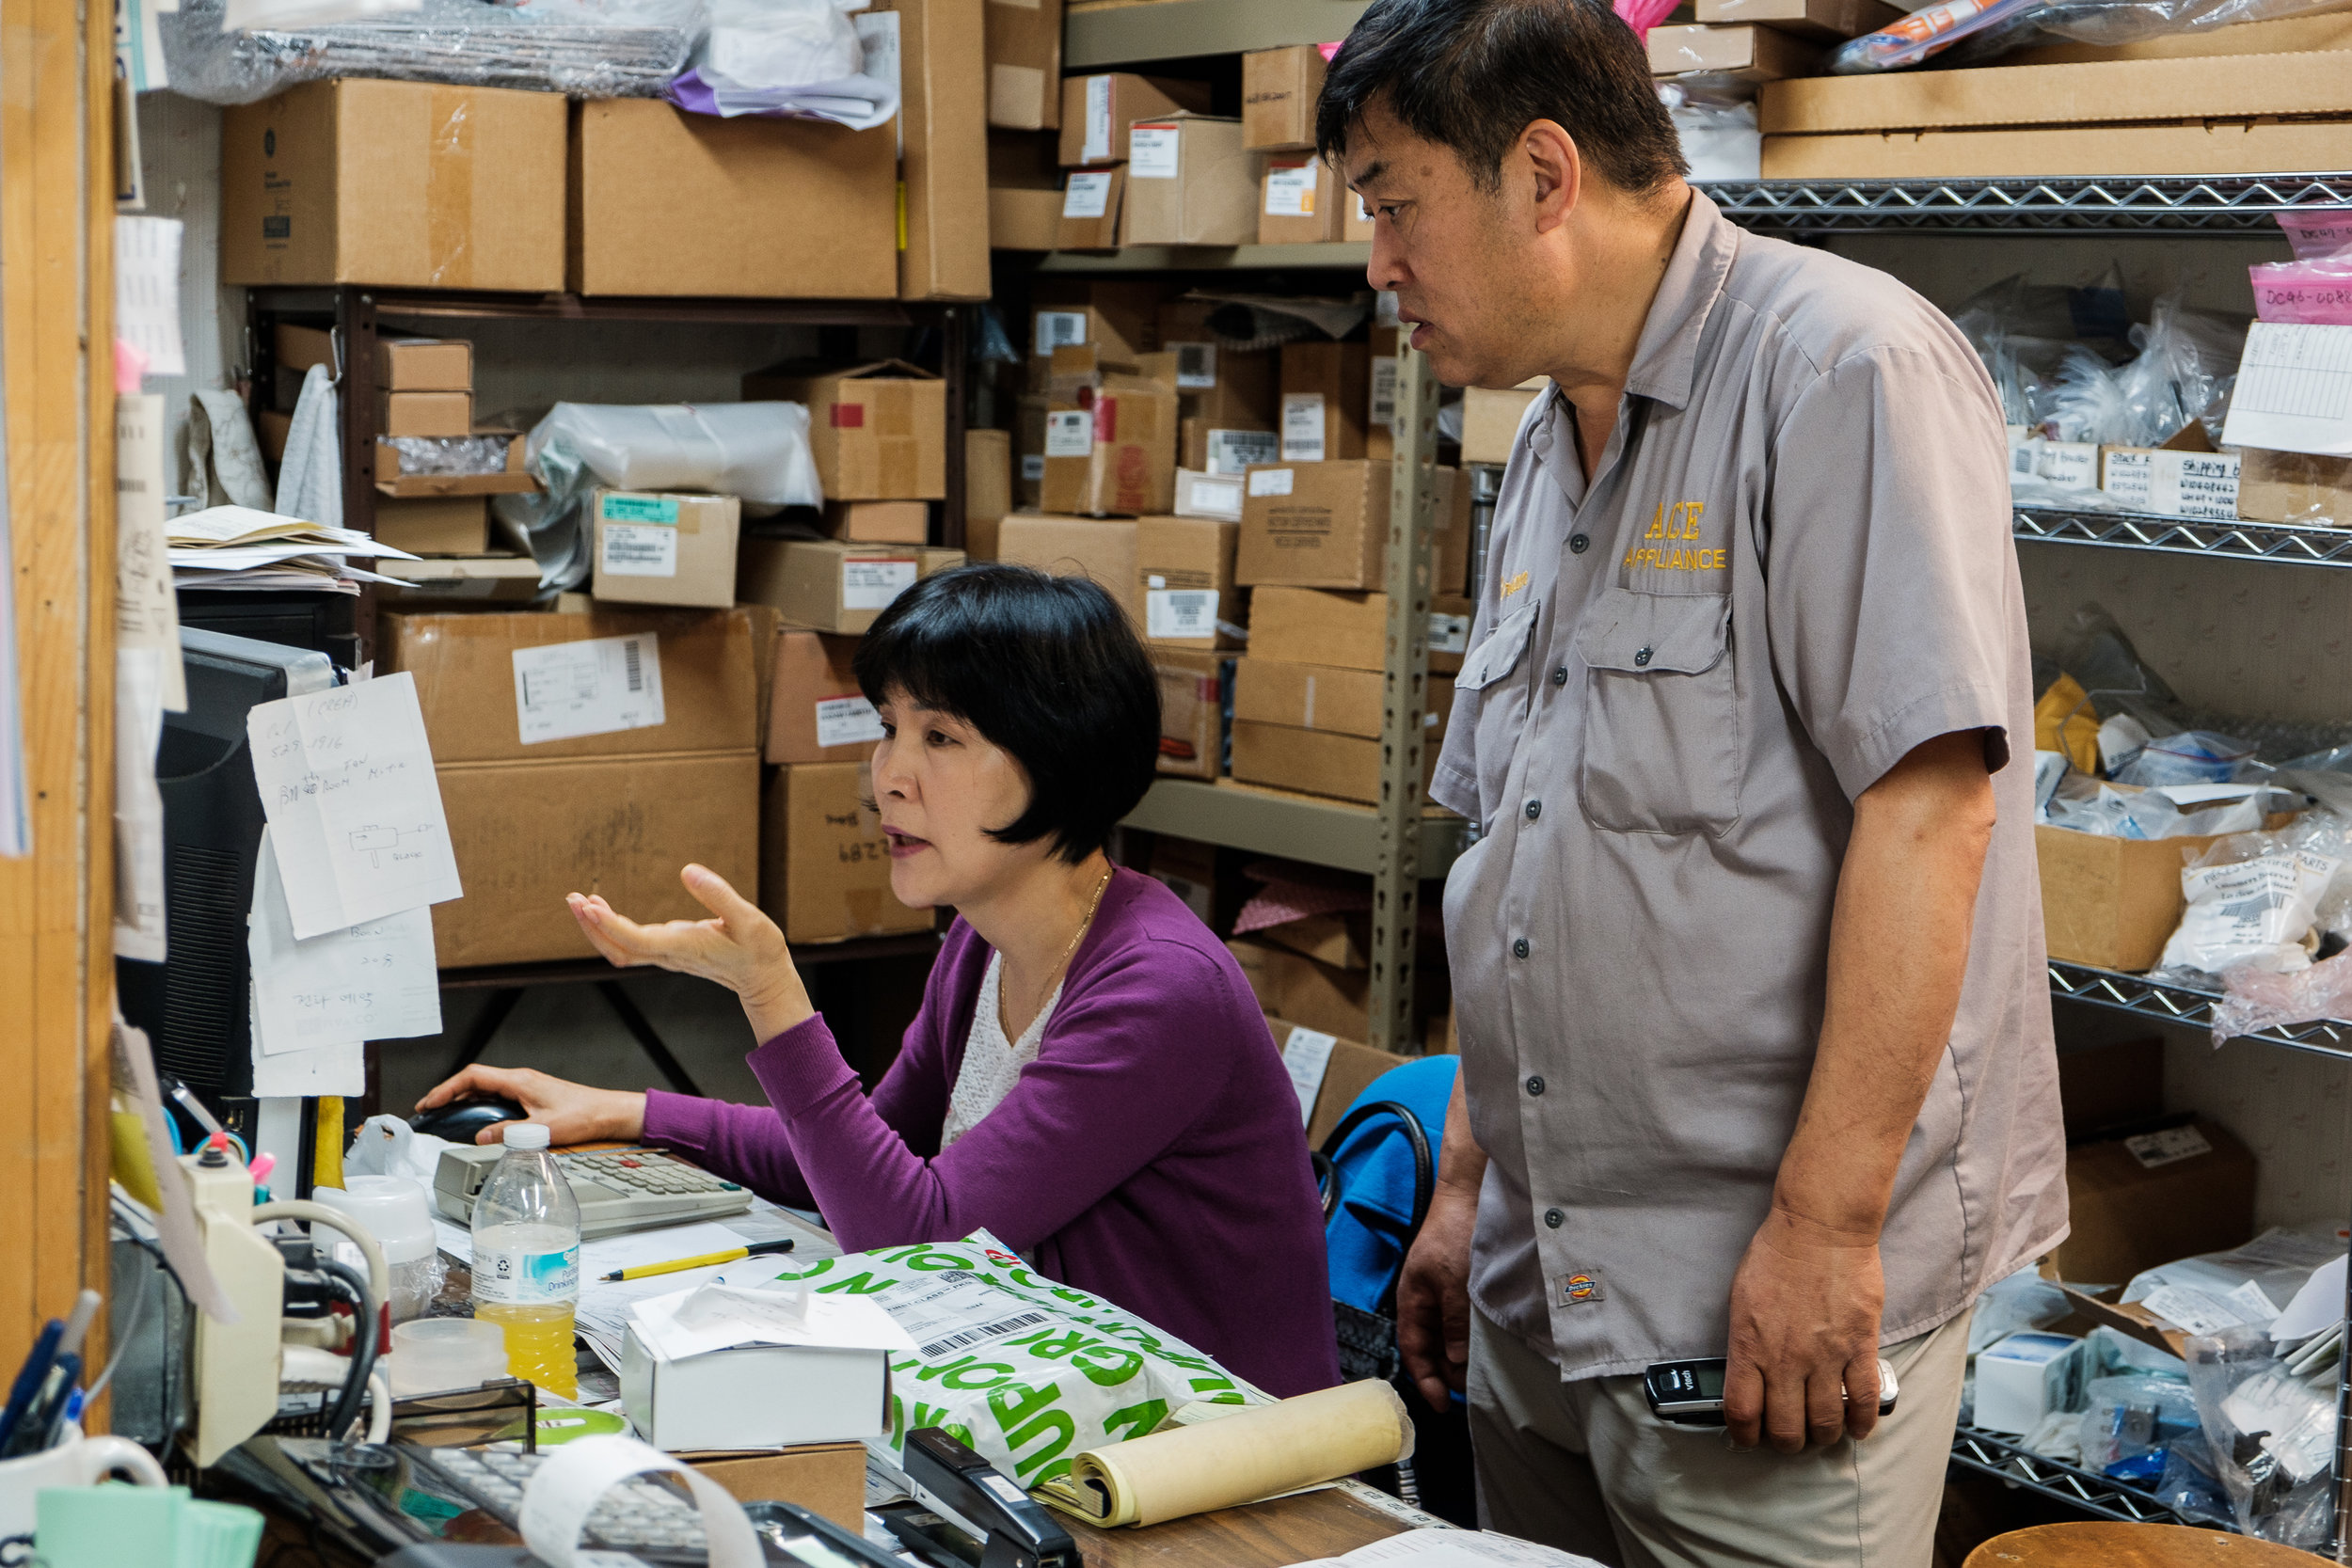
Park, known to many simply as Brian of Ace Appliance, has been fixing washers, dryers, dishwashing machines and refrigerators in Anchorage for more than 20 years. Park learned to repair while living in South Korea, where he was born and raised, during a time when the country was going through many changes — both industrially and economically.

"There was an industrial boom, and the government really pushed technical school on us," Park said. "Like the Japanese before us (South Koreans) and similar to what the Chinese have been going through recently, Korea wanted to prosper."

After graduating from technical school with an emphasis in electrical work and serving in the South Korean military (which was, and still is, mandatory for all male citizens of the country) as a telecommunications specialist in the Demilitarized Zone, Park started working for a home appliance company. There, he was able to put his new skills to use. This would also be the place where Park met his future wife, Boon.

170718-ChunBPark-10.jpg

After three years at the company, Park decided to move to the United States in 1985 to be closer to family that had already emigrated from South Korea. However, because he couldn't speak English at the time, the only skills he had weren't of much use. He wasn't able to talk to people about problems they were having with their appliances or order new parts.

But needing to earn an income, he worked odd jobs in restaurants and at the post office. He took these as an opportunity to provide for his family and learn English.

"It's not about what I wanted to do, but what I could do," Park said.

Following the birth of his first son, Park recognized he needed a career change to support his growing family. He shifted gears and went from being an hourly paid employee to a business owner after purchasing and taking over Ace Appliance in 1995, just 10 years after moving to Alaska. As a new business owner, Park remembers working more hours than he ever had at any previous job, but he didn't mind the long days. Running a business was something he grew to love.

"Being your own boss is good. Actually more than being good, it's ideal," Park said. "You don't want to be answering to someone else just because you're getting paid hourly."

And now after running Ace Appliance on Anchorage's Fireweed Lane for more than 20 years, Park has developed a rhythm for his day-to-day activities. In the mornings, he spends a few hours at his shop repairing different appliances and ordering parts. At around 11 a.m., his wife comes in with his lunch and works the front desk so he can then leave and make house calls. Park averages about seven or eight house calls a day and usually heads back to his shop in the evening to close before heading home with his wife. Park does this every day, six days a week, taking time off on select holidays and Sundays to attend church with his family.

Park isn't sure what he would be doing if he wasn't at Ace Appliance, but he is sure of one thing: He'd do whatever it takes to provide and fulfill his role as both a father and husband.

"It's my responsibility to take care of them," Park said.

How to Chase the Lights

Here is a shot overlooking the Chugach Mountains. This image was shot at a focal length of 35mm, f/1.4, 1.6 seconds, and an ISO of 640.

Here is a shot overlooking the Chugach Mountains. This image was shot at a focal length of 35mm, f/1.4, 1.6 seconds, and an ISO of 640.

[story and images originally for The Northern Light]

The ever elusive aurora borealis has become an increasingly popular subject for photographers since the introduction of the digital sensor. That's not to say that it wasn't possible before by using a traditional film camera, but having instant verification on the backside LCD of your camera to check whether you nailed the shot or not does help a great deal with keeping costs down due to the relative high price of shooting and developing film. There are, however, some basic guidelines to follow that will keep the time fumbling with the camera to a minimum and the time enjoying the light show to a maximum.

WHERE AND WHEN TO GO:

Location, location, location. This has been the mantra for real estate professionals for years, and the same applies for those who are seeking the northern lights. The biggest thing to keep in mind is that a place away from the city is going to be best as any light pollution will affect the visibility of the aurora. Great images usually include some sort of foreground element (like a campfire) and mid-ground elements (like water, trees, or mountains) in the composition, but don't feel discouraged if you can't get to a location that will accommodate either. Sometimes, if the lights are good enough it works really well to shoot straight into the sky.

Here is a shot from Fairbanks, Alaska. The tree line presented a nice silhouette to contrast the bright green of the aurora borealis. This image was shot at a focal length of 35mm, f/1.4, 2.0 seconds, and and ISO of 640.

Here is a shot from Fairbanks, Alaska. The tree line presented a nice silhouette to contrast the bright green of the aurora borealis. This image was shot at a focal length of 35mm, f/1.4, 2.0 seconds, and and ISO of 640.

There are a couple of other things to consider. Before heading out you'll want to pay close attention to the aurora forecast (http://www.gi.alaska.edu/auroraforecast). It's a good resource to reference, but it shouldn't be your only source of information. There are tons of websites and apps out there to help you decide when to go out and chase. Keeping an eye on the weather forecast is also a good idea. It is much easier to view the lights when it is clear out versus when it is cloudy.

WHAT TO BRING:

The Essentials:
camera (one that allows for use in a "manual" mode and RAW)
lens (the faster, the better)
tripod
battery (extras if you can afford them)
memory card

Optional:
warm clothing
flashlight or headlamp
campfire
water
snacks
friends

There are only a few things that are essential to capture the northern lights, but it’s always a good idea to try and include a couple things from the “optional list”. Making sure you are comfortable will lengthen the amount of time you are able to shoot in the cold, and the only thing more exciting than experiencing the aurora borealis is to experience it with friends, whooping and hollering. 

HOW TO SHOOT:

There are no magical “right settings” to use when making a photograph. It is a photographer’s job to determine how to manipulate the relationship between aperture, shutter speed, and ISO in order to capture an image that is representative of what was conceptualized within that person’s mind.

A good place to start would be to open up your lens’s aperture as much as possible (smaller f/ number). The more light that is let in, the better. Once you’ve set your aperture wide open, set your camera’s ISO to as high as what you feel is acceptable for producing an image that isn’t too noisy. For most cameras this will be somewhere between 800-1600. If your camera’s sensor is especially good with low light sensitivity, this number might vary. Next, you will want to set your shutter speed to something around four to eight seconds. Take a test shot to check how it looks. Again, remember that there are no “right settings”, so if it looks too bright either dial down the ISO or use a faster shutter speed. If the photo looks too dark, do the opposite and use a higher ISO or slower shutter speed. These recommended settings can be very different to what is needed depending on the available moonlight, starlight, cloud cover, and amount of light being reflected off the snow.

Once you’ve gotten your exposure looking the way you want, you’ll need to set your focus. This very well may be the most frustrating part of the entire process. Switch your camera into live-view and if your camera sensor’s low light sensitivity is good enough, attempt to manually focus your lens until your shot is in focus (either focus to infinity on the stars until they appear as a clean dot or an element of the scene in the foreground or mid-ground). If when switching to live-view you can’t see anything through your camera’s LCD, then there is a trick to achieving correct focus during even the darkest of night. Focus to infinity (or something in the distance) during the day and tape down the focus ring until you are ready to shoot later. Using gaffer’s tape is a good option as it will not leave any sticky residue upon removal.

This is a panorama stitch of 32 images from Eklutna Lake in Alaska. Each image was shot at a focal length of 24mm, f/1.4, 8.0 seconds, and an ISO of 320. The images were then stitched together using Adobe Lightroom.

This is a panorama stitch of 32 images from Eklutna Lake in Alaska. Each image was shot at a focal length of 24mm, f/1.4, 8.0 seconds, and an ISO of 320. The images were then stitched together using Adobe Lightroom.

Remember to shoot in RAW to retain the most information and allow yourelf the most flexibility to work with the image in post processing.

One more thing to consider is called the rule of 500. That is, to divide 500 by the focal length of the lens (in 35mm sensor equivalents). Keeping your exposure time below this number in seconds should ensure that star trails will not form.

Take all these things into consideration and experiment until you get an image that you like.

HOW TO PROCESS:

One half digital photography is in the processing. Once you’ve got all your RAW images imported into your processing software of choice, you will have a myriad of changes you can make. Adjusting the black, shadow, highlight, and white levels will give you an opportunity to tweak the exposure while modifying the hue, saturation, and luminance levels will allow you to change the colors. Just like shooting the actual photograph, experimentation is key. Keep in mind, however, that over-processing will result in artifacting and banding in the image.

The foreground element of Tail Race River in Alaska offers a nice reflection for the northern lights. This image was shot at a focal length of 28mm, f/2.0, 8.0 seconds, and an ISO of 800.

The foreground element of Tail Race River in Alaska offers a nice reflection for the northern lights. This image was shot at a focal length of 28mm, f/2.0, 8.0 seconds, and an ISO of 800.

AFTER THE SHOT:

The northern lights are a spectacular sight to behold, and capturing the aurora on camera can be an adrenaline rush. As with all things, practice makes perfect, so make sure to get out as often as you can and try to capture the lights in all their glory.